
If you've arrived here via my
Mathematically-based computer graphics
page, presumably you'll have read my misty-eyed ramblings about the "good
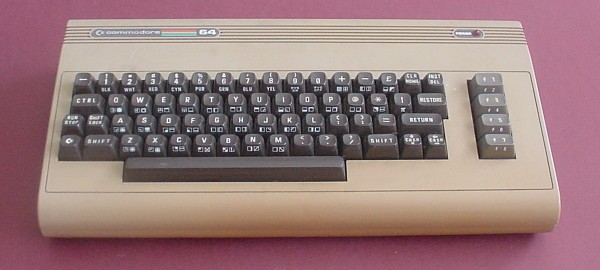
old days" when the Commodore 64 ruled, OK.
In the early 1980's, the "IBM PC" was in its infancy. Its operating system
was an early version of DOS. It was a monochrome device (green on black,
usually). For a sound system, there was a tinny little speaker built into
the case which didn't do much more than "beep" - unless you knew some
machine code and could program it to do something more exciting.
Worst of all, the PC was - for most practical purposes - merely a
text-based machine. It had very little provision for graphics, which were
seen at the time as a somewhat frivolous extravagance.
Click
here
to read a very presentable history of the PC, which goes into these matters
in considerable depth.
The Commodore 64 was the very antithesis of the PC. Even though its screen's
resolution was much less than that of the PC, every single pixel it
did have was available to the programmer - with a choice of sixteen
possible colours.
That's not to say it was necessarily easy to do graphics on the C64. There
were a few different things you could do, which all involved PEEK's and
POKE's (or their machine code equivalents) to some extent - but if you were
determined and persistent enough, you could manage it. There was no shortage
of literature around (books and magazine articles) from which to learn the
basics.
Just as exciting was the C64's sound system! Built into the machine was a
SID
chip (an acronym for Sound Interface Device). This little piece of magic
was a fully functional three-voice synthesizer with which it was possible to
produce some quite extraordinary effects, including ring modulation and
synchronization. As with graphics, there were tricks to learn; but the
rewards were there if one made the effort - and, again, there were plenty of
articles to read and examples to type in.
The C64 was a fun machine from which the serious hobbyist could learn a
lot about both programming and hardware. If you were already an
electronics buff (as I was), and thus could understand basically how the
machine was put together, playing around with it was sheer heaven. Quite
unlike the dreary old PC, this was a godsend for the "tinkerer".
To produce artwork with high-resolution graphics, there were several
software packages one could purchase. Probably the best known was "Doodle";
there was also one with the very silly name "Blazing Paddles". As a
dedicated Baked Bean fan, I was most amused by the obvious allusion to the
brilliant Mel Brooks film "Blazing Saddles".
(If you haven't seen the film, make an effort to do so - then the
significance of the last sentence will become clear.
Update, 15th October 2010:
Alternatively, you could just type "blazing saddles campfire scene" into
Google, and thus have access to some YouTube video clips of the relevant
sequence...
I bought a rather good graphics package called "The Advanced OCP Art
Studio", with which one could produce pictures in either high-resolution or
multicolour mode (which allowed for up to four colours within an 8×8 pixel
block but with double-width pixels). With that, I produced the following
hi-res graphic, which is the main inspiration for this page:
Now, if you're paying attention, the next question which should spring to
mind is: "How do you get C64 graphics into a PC?"
In fact, there are ways to do it via software. There are websites which are
dedicated to making the modern multimedia PC into a C64 emulator - right
down to the slow old 1541 disc drive!
This is something I'd like to do at some stage; but for the moment, I've
used a more "low-tech" approach to produce the graphics on this page.
You may have noticed that the Humpty Dumpty picture above looks a bit
scrappy. This is because it has had to go through a number of steps to get
here, each one of which introduces imperfections.
In 1988, about three years after I bought the C64, I purchased an MCS810
printer for it. Advertisements for this printer had appeared in various
Commodore-specific magazines under its original name of Okimate 20. It
claimed to be able to print both text and graphics in vibrant colour, and I
was intrigued with the idea.
Click
here
to see a picture of this little machine. (To get any sense out of the three
links to other photos at the bottom of the page, you'll need to have
Javascript switched on.
A strange beast, it used a special ribbon which came in what looked a bit
like an audio cassette only about twice as big. You could get both black and
colour versions.
The ribbon was a transparent thin plastic strip with a wax coating on one
side. The printer's head ran along the non-waxed side from left to right,
its pixel-sized heating elements melting the wax onto the paper according to
the image transmitted to it from the C64. Then the head would return to the
left, and the ribbon would be shuttled along to a fresh bit ready for the
next operation.
When printing monochrome with a black ribbon, the paper would be rolled up
a line at the end of each operation. However, when printing in colour, the
machine seemed to take on a life of its own - a very odd thing to see!
For colour printing, three passes were required for each line. The ribbon
contained short strips of wax in each of the three primary pigment colours
yellow, magenta, and cyan (in that order, as I recall). For each line, the
printer would move the first colour strip into place and print the line.
Then the head would move to the left and the ribbon would be jiggled along
to the next colour strip, and the line would be reprinted. This process
would be repeated for the third colour. Finally, the paper would roll up
ready to start the next line, the head would return to the left, and the
ribbon would clatter along to the next waxed segment of the first colour.
The first time I printed a colour graphic, I thought the gadget was going to
shake itself to pieces!
As you may imagine, there were many things that could go wrong: several
moving parts which needed to act exactly in step; the electronics which
controlled the movement; and the heating elements in the head.
When it worked as it was supposed to, it produced very attractive printouts
(as this page testifies). However, when it misbehaved, the results could be
a bit of a disaster.
Eventually, the head burned out. With great difficulty, I managed to obtain
a replacement, which worked well enough for a while - but eventually, other
things started to go wrong, and the day came when I just had to write the
printer off.
I think it was a clever idea, but perhaps ahead of its time. Ink-jet
printers (a related technology, in some ways) were just being developed
around then, and were nowhere near as ubiquitous as they are now - and they
also had their fair share of problems. (It's always seemed to me that
printers, with their myriad moving parts, are the weak link in any
integrated computer system, and probably always will be.)
However, looking on the bright side, I did get some impressive results with
the old thing before it died, and I had the presence of mind to keep them.
Each being about the size of a standard photo print (13.4cm × 10.3cm), they
found their way into a good-quality photograph album.
The pictures you see in this page were scanned from my printouts, resized
using DISPLAY to make them a suitable size for posting here, and finally
tidied up a bit around the edges by cropping, also with DISPLAY.
As you can see, they're not perfect. It's not too hard to see where the
individual lines are. Also, you may notice that sometimes there's a slight
"checkerboard" look about some of the colors (for example, the octopus,
seawater, and sand in the above picture, and the sky and banner background
in the Humpty Dumpty picture). This occurs because the printer used a very
simple form of dithering for some lighter colours, whereby
one-quarter of the pixels were left white. (Actually, when it works well,
it's rather attractive.)
I produced quite a few pictures with the Advanced OCP Art Studio. These were
fun to do, and enabled me to learn valuable skills for later use with
software such as Neopaint. However, my main interest with regard to graphics
was to generate mathematically-based images like surfaces, biomorphs, and
zooms of the Mandelbrot Set.
Eventually I did, and some of the results follow. The photograph album began
to fill up. One of my kids, not much more than a toddler at the time, took a
great interest in the pictures; for a while, a regular activity we shared
was to browse through the album - which thus came to be known as the Humpty
Dumpty Book.
This picture - a kind of hybrid of graphics and artwork - strikes a chord in
me. To my mind, it has a mystical quality. I produced it using Simons'
Basic, and named it "Evening in Kalos". Something in me yearns to visit this
place, somehow...
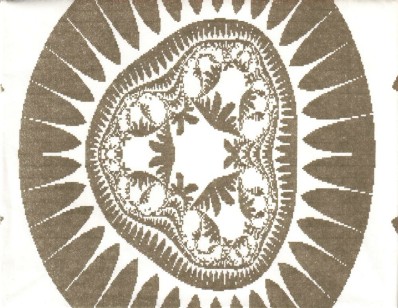
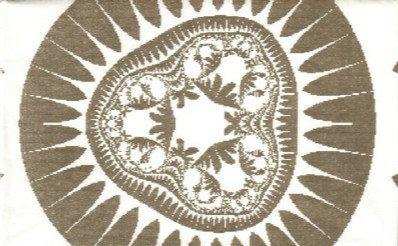
Here's a monochrome radiolarian. (If you've visited my
Fractals #2: Biomorphs
page, you'll have seen a PC BASIC version of this pattern.)
Notice that it's somewhat stretched in the vertical direction. There may be
several factors contributing to this, including the fact that the aspect
ratio of the C64 screen (320/200, i.e. 1.6) is different from that of PC
BASIC's SCREEN 12 graphics mode (640/480, i.e. 1.3333); and there may be
some distortion generated by the MCS810 printer itself. I used DISPLAY to
attempt to correct this; shrinking the vertical dimension down to 80% gives
a quite good result:
I haven't bothered to do anything similar with any other pictures on this
page, preferring simply to present them essentially as they emerged from the
printer.
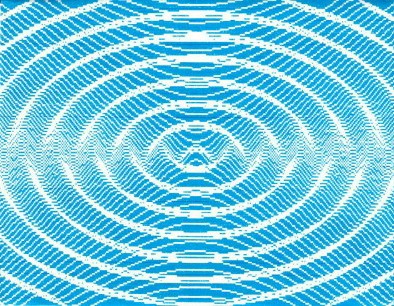
Here's an attempt to show ripples on a pond, caused by dropping in a small
object such as a pebble:
Success with this graphic led, years later, to my production on the PC of
an animated gif of ripples moving outward. This is featured in my
Animated surfaces
page.
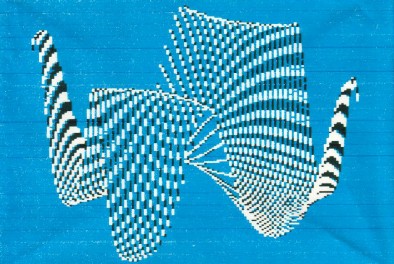
The next surface, of the form z = f(x,y), was generated in a similar way to
the mountainous island near the bottom of my
Animated surfaces
page. I can't remember the details of the actual function; if I ever come
across the equation, I'll post it here:
This is the first example in this page of a medium resolution,
or "multicolour", picture. Because three colours are used, and in some
instances all three are required within a particular 8×8 pixel block, it was
necessary to use multicolour mode. This made all pixels double-width, so
that each of the thousand (40×25) 8×8 pixel blocks on the screen effectively
became 4×8 blocks instead. Depending on a particular graphic, good results
were sometimes thus obtainable; this is one which works rather well.
If you're an old C64 hand, this will all be second nature to you; if not,
you may find it quite confusing. Surely hi-res pictures like Humpty Dumpty
and Octopus's Garden (above) have more than two colours...? Indeed they do -
but there are only two colours within each of the thousand 8×8 blocks! A
good C64 artist learned to work within this limitation, which thus became
invisible to the casual viewer.
Interestingly, a similar effect did manifest itself with the PC when
I was doing some deep zooms into the Mandelbrot set, years later. If you go
to too many decimal places, you go beyond the computer's capability to
distinguish between numbers, and the result is a compromised graphic. You
can see an example, with commentary, by clicking
here.
(Scroll about halfway down the page.)
Of course, a lot has happened since the early 1980's. A decade later, the
multimedia PC arrived on the scene, with excellent graphics capabilities -
exceeding those of earlier computers, including the C64 - inviting
programmers to take advantage of these new features.
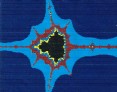
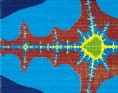
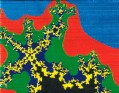
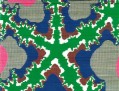
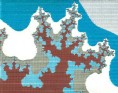
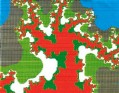
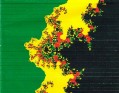
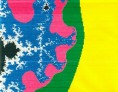
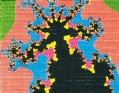
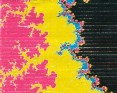
Following are twelve small pictures each showing a C64-generated image from
the Mandelbrot set. You can click on each of these to reach a page featuring
a larger version (similar in size to those above) and some information about
it. Each such page contains a link to yet another page featuring graphics
generated on my PC of the same area (or, in the case of the ninth example,
at least a very similar area).
Note that almost all of the pictures in these pages were generated in
multicolour mode on the C64. Just one - in the sixth page - was
produced using hi-res mode. More detail about matters arising are given in
that page.
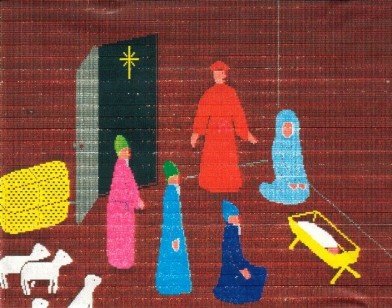
To close this page in as incongruous a way as possible, here's yet another
hi-res masterpiece I drew using The Advanced OCP Art Studio. One Christmas,
as I recall, some of our friends received cards featuring this picture. It's
a nativity scene, featuring the
Three Kings of Orientar
My home page
Preliminaries (Copyright, Safety)
The Humpty Dumpty Book
 )
)


 )
)
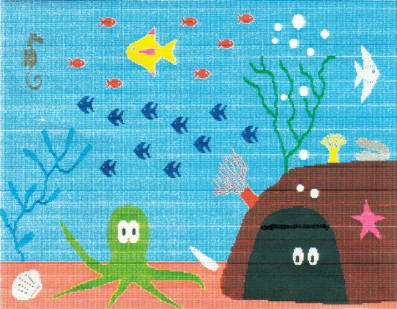
My tribute to Ringo Starr's famous kid's song, "Octopus's Garden"


hd-m01.jpg
hd-m02.jpg
hd-m03.jpg
hd-m04.jpg

hd-m05.jpg
hd-m06.jpg
hd-m07.jpg
hd-m08.jpg
hd-m09.jpg
hd-m10.jpg
hd-m11.jpg
hd-m12.jpg
, the baby Jesus, Mary, a few lambs, and a somewhat
exasperated-looking Joseph!
"We three kings of Orientar,
One in a taxi, one in a car,
One on a scooter, tooting his tooter,
Going to Zanzibar..."
 Return to Computer Graphics sub-menu